Welcome to YSAJ 2014! Get ready for a heck of a lot more tutorials!
Girls with straight hair often want curly hair, and girls with curly hair often want straight hair, but where does that leave girls with wavy hair? Wavy hair is tough, some days it air dries like a Victoria's Secret model, and some days it just looks homeless.
Enter: Your Stylist AJ! When Chicago wedding and lifestyle photographer, Christy Tyler, posted on Instagram about discovering she had some natural wave/curl but didn't know how to style it, I invited her to come into Thomas West Salon. I taught Christy how to easily embrace her natural texture and rock it!
You will need:
- a Wet Brush or comb
- curl enhancing products // we used Aveda Be Curly (even Chloe pup digs it!) and Bumble and Bumble Thickening Full Form Mousse (both available at Thomas West Salon)
- curling iron or wand (optional)

Lets get started! (In my best aerobics instructor voice!)
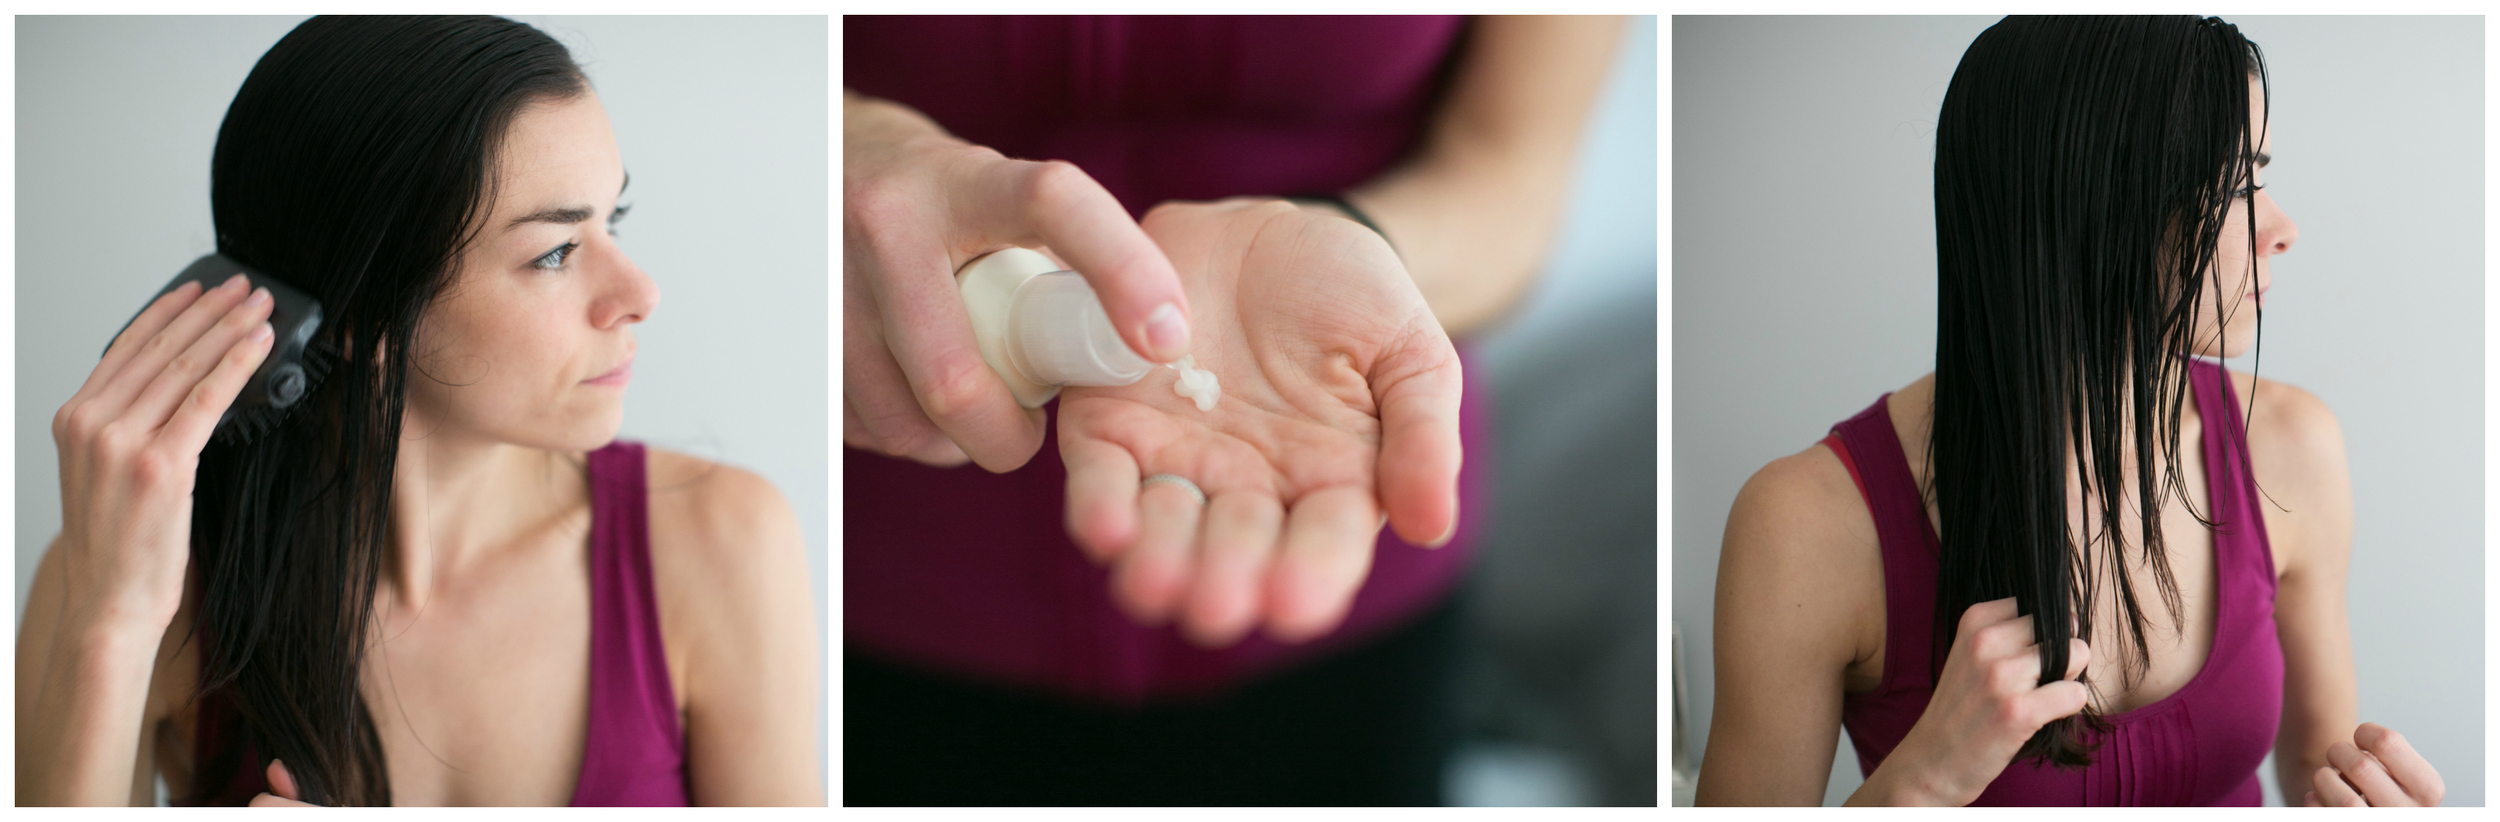
1. Shampoo, Condition from ponytail down, and towel dry hair. Comb through, and towel dry again. If too much water is still in the hair, it will actually create a barrier for the product. Add your curl enhancing product to your palms, and rake fingers and hands through your hair, beginning at the ends, and using what's "left over" on your roots.
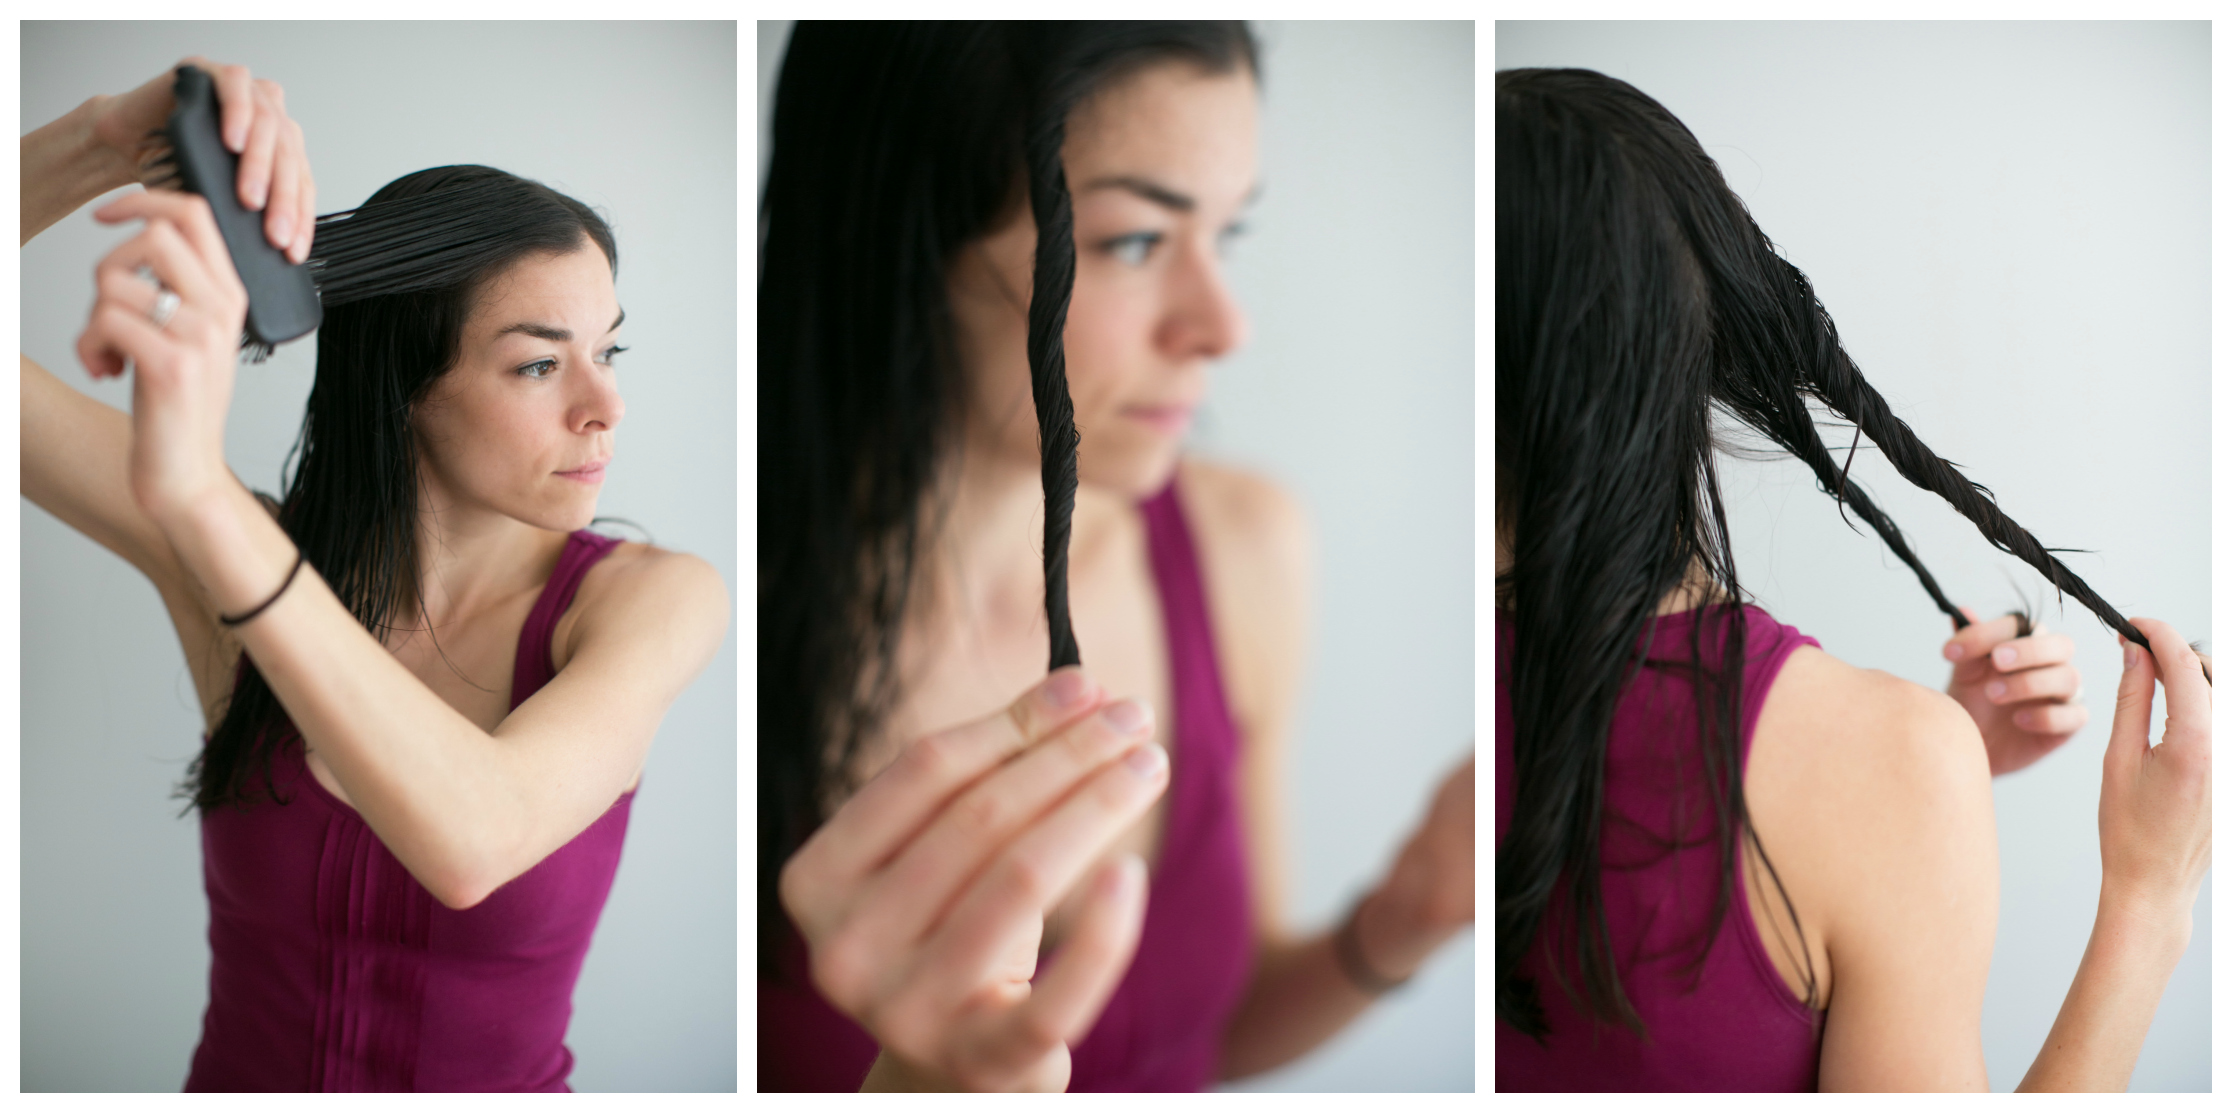
 2. Comb large sections of hair up at a 90 degree angle, and begin twisting away from the face. Twisting with the 90 degree angle ensures you get plenty of volume. Work your way back section by section until all hair is twisted.
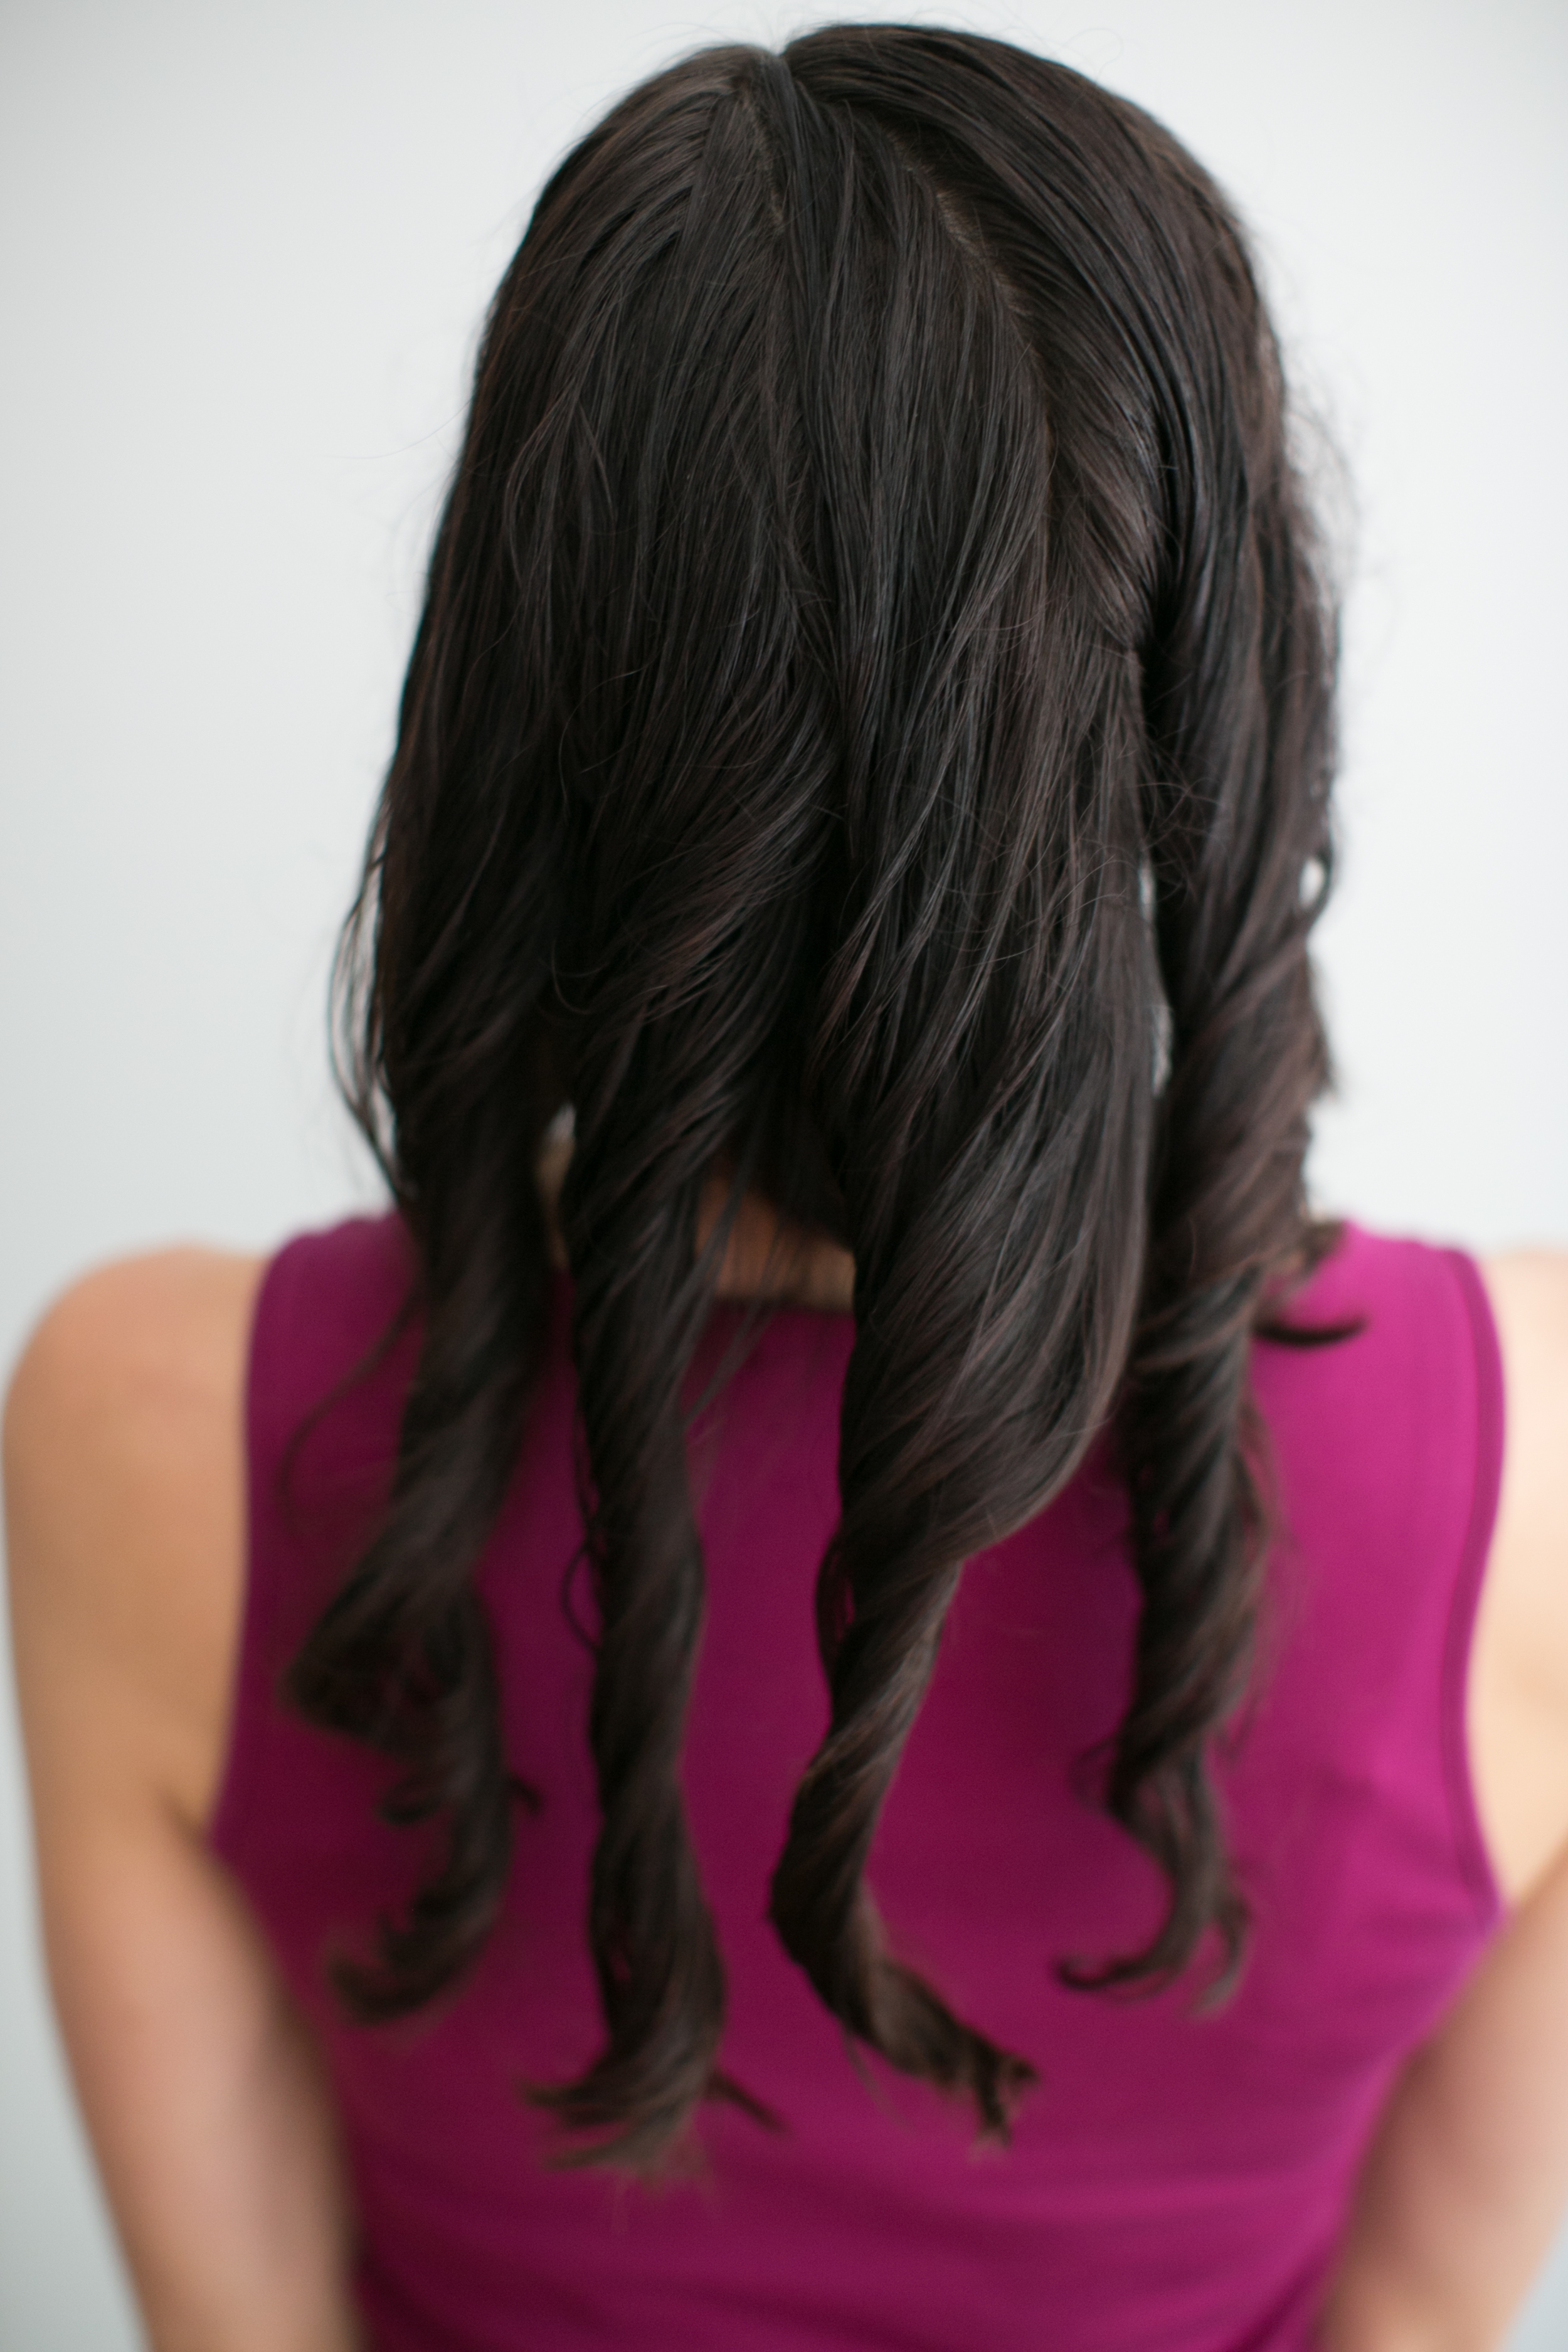
 It should look a little like this!
3. I suggest doing steps 1 and 2 at night, and sleeping with your damp twisties either down or in a messy bun, from there you can wake up and shake it out! How cute is Christy!? If you prefer to shower in the morning, I suggest air drying.
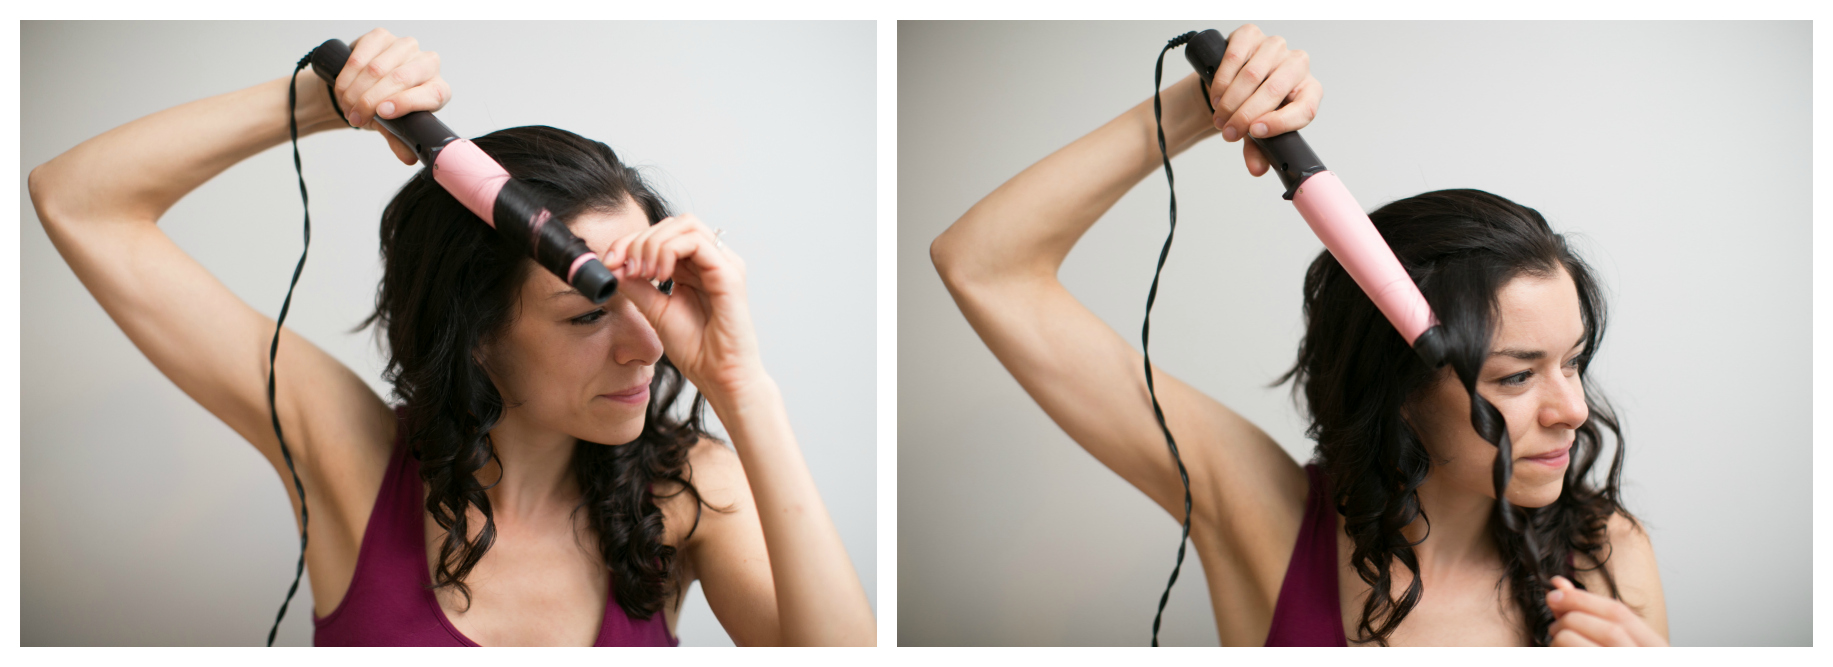
 4. Most girls with natural texture have the most wave in the ends, I recommend touching up just a few pieces on top for added polish and volume. You can do this using a regular curling iron, curling wand, or by curling with your flat iron. (BONUS TIP: You can use your curling iron like a wand by not opening the clamp!)
 5. Add a finishing product and work through to add volume and extra dimension. Hair spray is great here, but I like breaking the rules and using mousse sometimes!
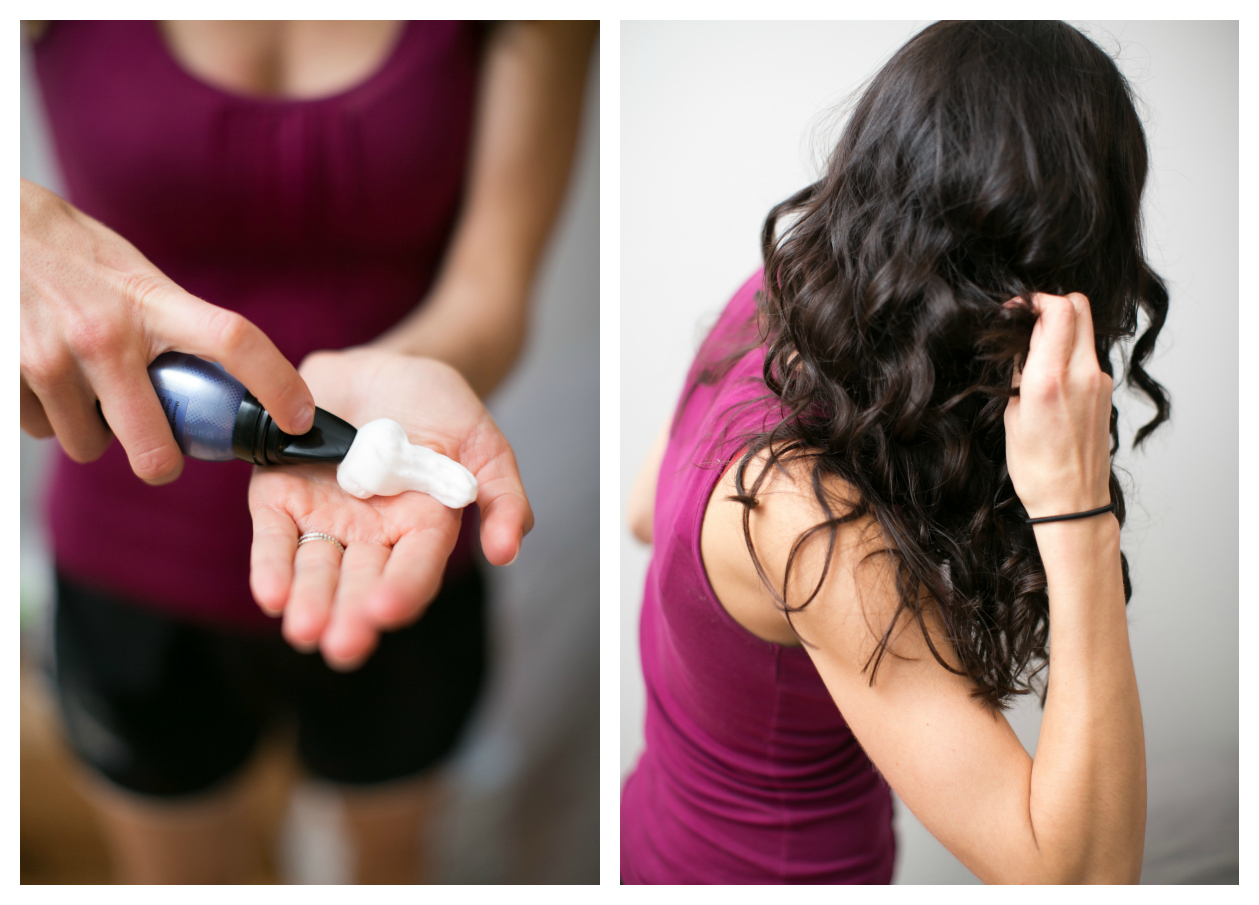 It's that easy! If you sleep with your wet twisties, all you have to do is wake up to shake and add a lil product! Plus skipping the step of blow drying gives your hair a break from high heat!
Have fun!
XO
AJ
Photos by Christy Tyler Photography