Tutorial

EASY Hair Tutorial

Buns2
Buns2

You may recognize this pretty head of hair from our HoneyBuns Tutorial! This tutorial is even easier! It reminds me of a french twist because of it's vertical architecture, but is a little younger and more fun to look at!

1-2. Begin by creating three sections horizontally, and clip the top two out of the way.

3. Next, twist your bottom section up into a bun, and secure with bobby pins.

4-5.  Continue to work up the sections, twisting them into buns, and securing with bobby pins.

6. Complete the look with your favorite hairspray!

Don't forget to tag your creations on Instagram using the hashtag #YSAJtutorial

XO AJ

Thank you Emilia for the gorgeous photos!

Easy Fancy Bun Tutorial

Emilia Jane Photography

Hi lovlies! Welcome back to another tutorial! This Fancy Bun is SO easy, but looks just a little extra special than your typical bun. Check it out!

To get the look at home:

1-2. Leaving the "sides" out from the ears forward, gather the back section and place into a low ponytail.

3. Twist the pony and wind it around the base of the elastic.

4. Secure with hair pins.

5. Take the first side section and twist away from the face.

6. Place the twisted section above the bun, and loosely wrap what's left over around the bun, securing with a bobby pin.

7. Repeat on the other side.

8. Rock your Fancy Bun and put it on Instagram using the hashtag #YSAJtutorial

XO AJ

Thank you to Emilia Jane Photography for capturing this look for us!

Honeybuns Hair Tutorial

Unknown
Unknown

HI honeybuns! Today I’m psyched to deliver a brand new, and of course easy peasy, hair tutorial. Thank you to my beautiful little sister for helping me create this tutorial! She’s even cuter from the front!

1-3. Begin by taking a circular section from the crown, and clipping it out of the way.

4. Divide the remaining hair into three sections.

5-6. Begin with the back center section and twist the hair into a bun. Secure with bobby pins.

7-8. Continue by twisting the side sections away from the face and into little buns, one at a time. Secure with bobby pins.

9. Unclip the section from the crown and divide it into two sections. Now, cross those two sections, one over the other.

10. Spin each of the sections away from each other and into more little buns. Secure the two new buns with bobby pins.

Try it. Nail it… and then change it! Vary how many buns you use, where you pin them, how much volume you want, etc. This style looks gorgeous, but as you can see can be done if just a few short steps. We photographed the whole thing in under five minutes!

This is also a great option for you short hair ladies. Itty bitty buns are cute too ya know.

YSAJ hair tutorials 5 buns-36

I’d love to see your honeybuns! Tag your looks on insta using #YSAJtutorial : ) It’s been so fun to see you all master the Messy Side Bun tutorial this week, thank you for sharing!

XO AJ

Thank you Emilia Jane Photography for your time and talent!

Adios February

Sometimes life runs according to plan, and sometimes is doesn't at all. My February was full of surprises. FEB RECAP:

Travel hair I drove down to Florida with Sammy for Spring Training. Hard to believe it's Spring Training when Chicago is getting lambasted with snow right now.

Union Hotel

We stopped in Nashville along the way for a night of live music and authentic BBQ. We stayed at the Union Hotel which I HIGHLY recommend.

FLA

Florida was magic. I ate at my same favorite restaurant like four times in a matter of days.

vegas

I was back in Chicago for less than a week, but worked two full work weeks in that time. Then, it was off to Vegas for the Project & Magic apparel shows for Bonnie & Clyde. We wrote some fresh new lines, attended seminars, and even had a second to dip our toes in the pool. All good "I miss Sammy" distractions.

kina

While I was out west Kina took some photos of me in the desert! We had too much fun hiking in heels and singing Sara Bareilles as the sun set. Love that girl.

IMG_0648aj2

As soon as I got back I spent two days revving up the courage to apply for the Allure Magazine Beauty Blogger competition. Part of the submission asks for a video, so I finally worked up the courage to post a video tutorial after two years of terrifying anticipation.

Screen Shot 2014-03-03 at 9.51.13 AM

The NEXT day I got a call from Goody. They had just seen my video and were interested in shooting tutorials with me in NYC for the weekend. So I refilled my suitcase for the third time in three weeks and headed to the airport with my gorgeous and talented friend Lindsey for the weekend. Friday was a long day of consulting and test shooting, and then yesterday during the awards we recreated looks we saw the celebs rocking and released them right away. You can view them all HERE.

happybones

As soon as I was done, I learned my flight for this morning was actually cancelled. I've spent a combined four hours on hold and still won't be getting into Chicago before 9pm. So, I'll make the best of it with amazing coffee and even more amazing spoons. (Photo by #EATPRAYPHOTO)

THINGS I LEARNED THIS MONTH:

Ask and you shall receive.

Put yourself out there, you have nothing to lose. Really.

Friendship is weird. In a good way.

NYC has the best latte I've ever had. If you visit check out Happy Bones.

The camera adds ten pounds but I clearly have more than that to lose. Back on the paleo grind effective immediately, but more importantly, excited to get serious about working out. I'm craving that healthy routine and feeling really good and light. Who wants to go to yoga and Flywheel with me this week?

I appreciate Chicago.

My family is pretty awesome. They acted like I was actually a celebrity instead of just mimicking celeb hair.

I'm continuously blown away by Sammy. I have learned so much about life and hard work from that man. So proud of him.

How was your February? Cheers to March!

XO AJ

Messy Side Updo Tutorial

If you know me, there's no doubt that I have no problem striking up convo with a stranger or being extremely outgoing. Heck! I talk to fresh faces on a 45 minute rotation at the salon every day.

So why in the world has it taken me two years to make a video hair tutorial?

BECAUSE IT'S TERRIFYING.

Now that I've crossed making my first vid off my career bucket list, I'm psyched to deliver a million more. I'm JUST getting started. I learned so much through this process: film during natural light- duh, don't say "like", slowww down and practice prior. But I can only get better from here, so get excited.

I hope you learned a new fun and super simple style to incorporate in your hair routine. Let me know know what you think!

What tutorials would you like to see next?

XO AJ


Hair Tutorial // Half Up Headband

Bobby pins aren't for everyone, so grab the nearest elastic headband and you can have a gorgeous half up style in seconds! I recently posted this pic on instagram and you asked for a tutorial. Get ready, it's SO easy.

Your Stylist AJ Hair Tutorial

1. Begin by placing an elastic headband over your head. Play around to find your comfy spot! The gold headband I used is from Urban Outfitters, but I've done this look with an inside out Under Armour workout headband and it looked dressy too!

2. Take a section of hair from the right side of your head just above your ear and wrap towards the left.

3. Tuck the section into the headband from top to bottom. No pins required!

4-5. Repeat on the left.

6. Rock your look and soak up the zillion compliments you'll get all day!

Your Stylist AJ Hair Tutorial

Feel free to leave questions or comments below!

XO AJ

Top is from Anthropologie

Thank you to the amazzzzing Emilia Jane for the photography!

Wavy Hair Tutorial

Welcome to YSAJ 2014! Get ready for a heck of a lot more tutorials! Girls with straight hair often want curly hair, and girls with curly hair often want straight hair, but where does that leave girls with wavy hair? Wavy hair is tough, some days it air dries like a Victoria's Secret model, and some days it just looks homeless.

Enter: Your Stylist AJ! When Chicago wedding and lifestyle photographer, Christy Tyler, posted on Instagram about discovering she had some natural wave/curl but didn't know how to style it, I invited her to come into Thomas West Salon. I taught Christy how to easily embrace her natural texture and rock it!

You will need:

  • a Wet Brush or comb
  • curl enhancing products // we used Aveda Be Curly (even Chloe pup digs it!) and Bumble and Bumble Thickening Full Form Mousse (both available at Thomas West Salon)
  • curling iron or wand (optional)

products used


Lets get started! (In my best aerobics instructor voice!)

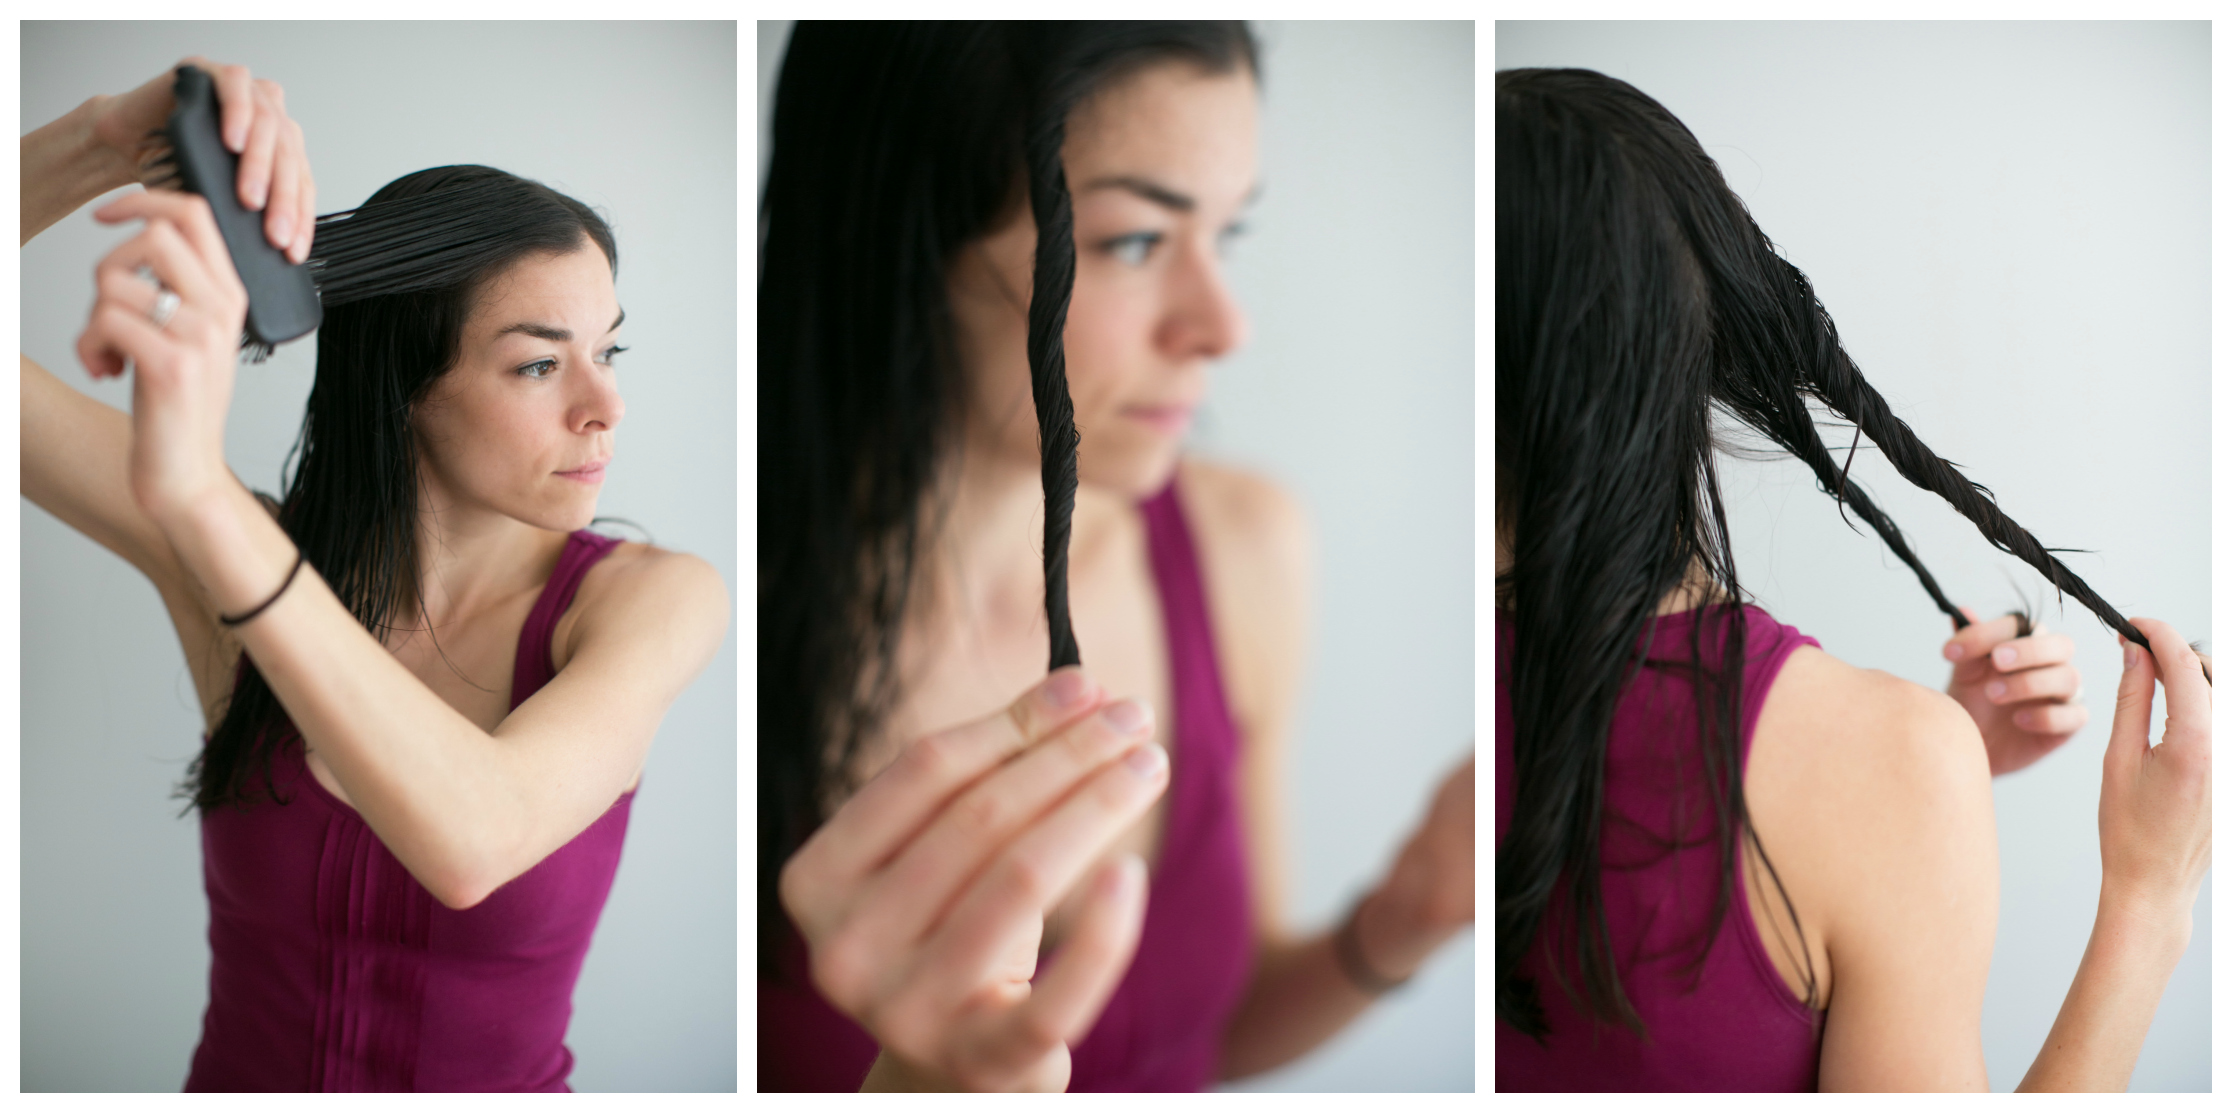
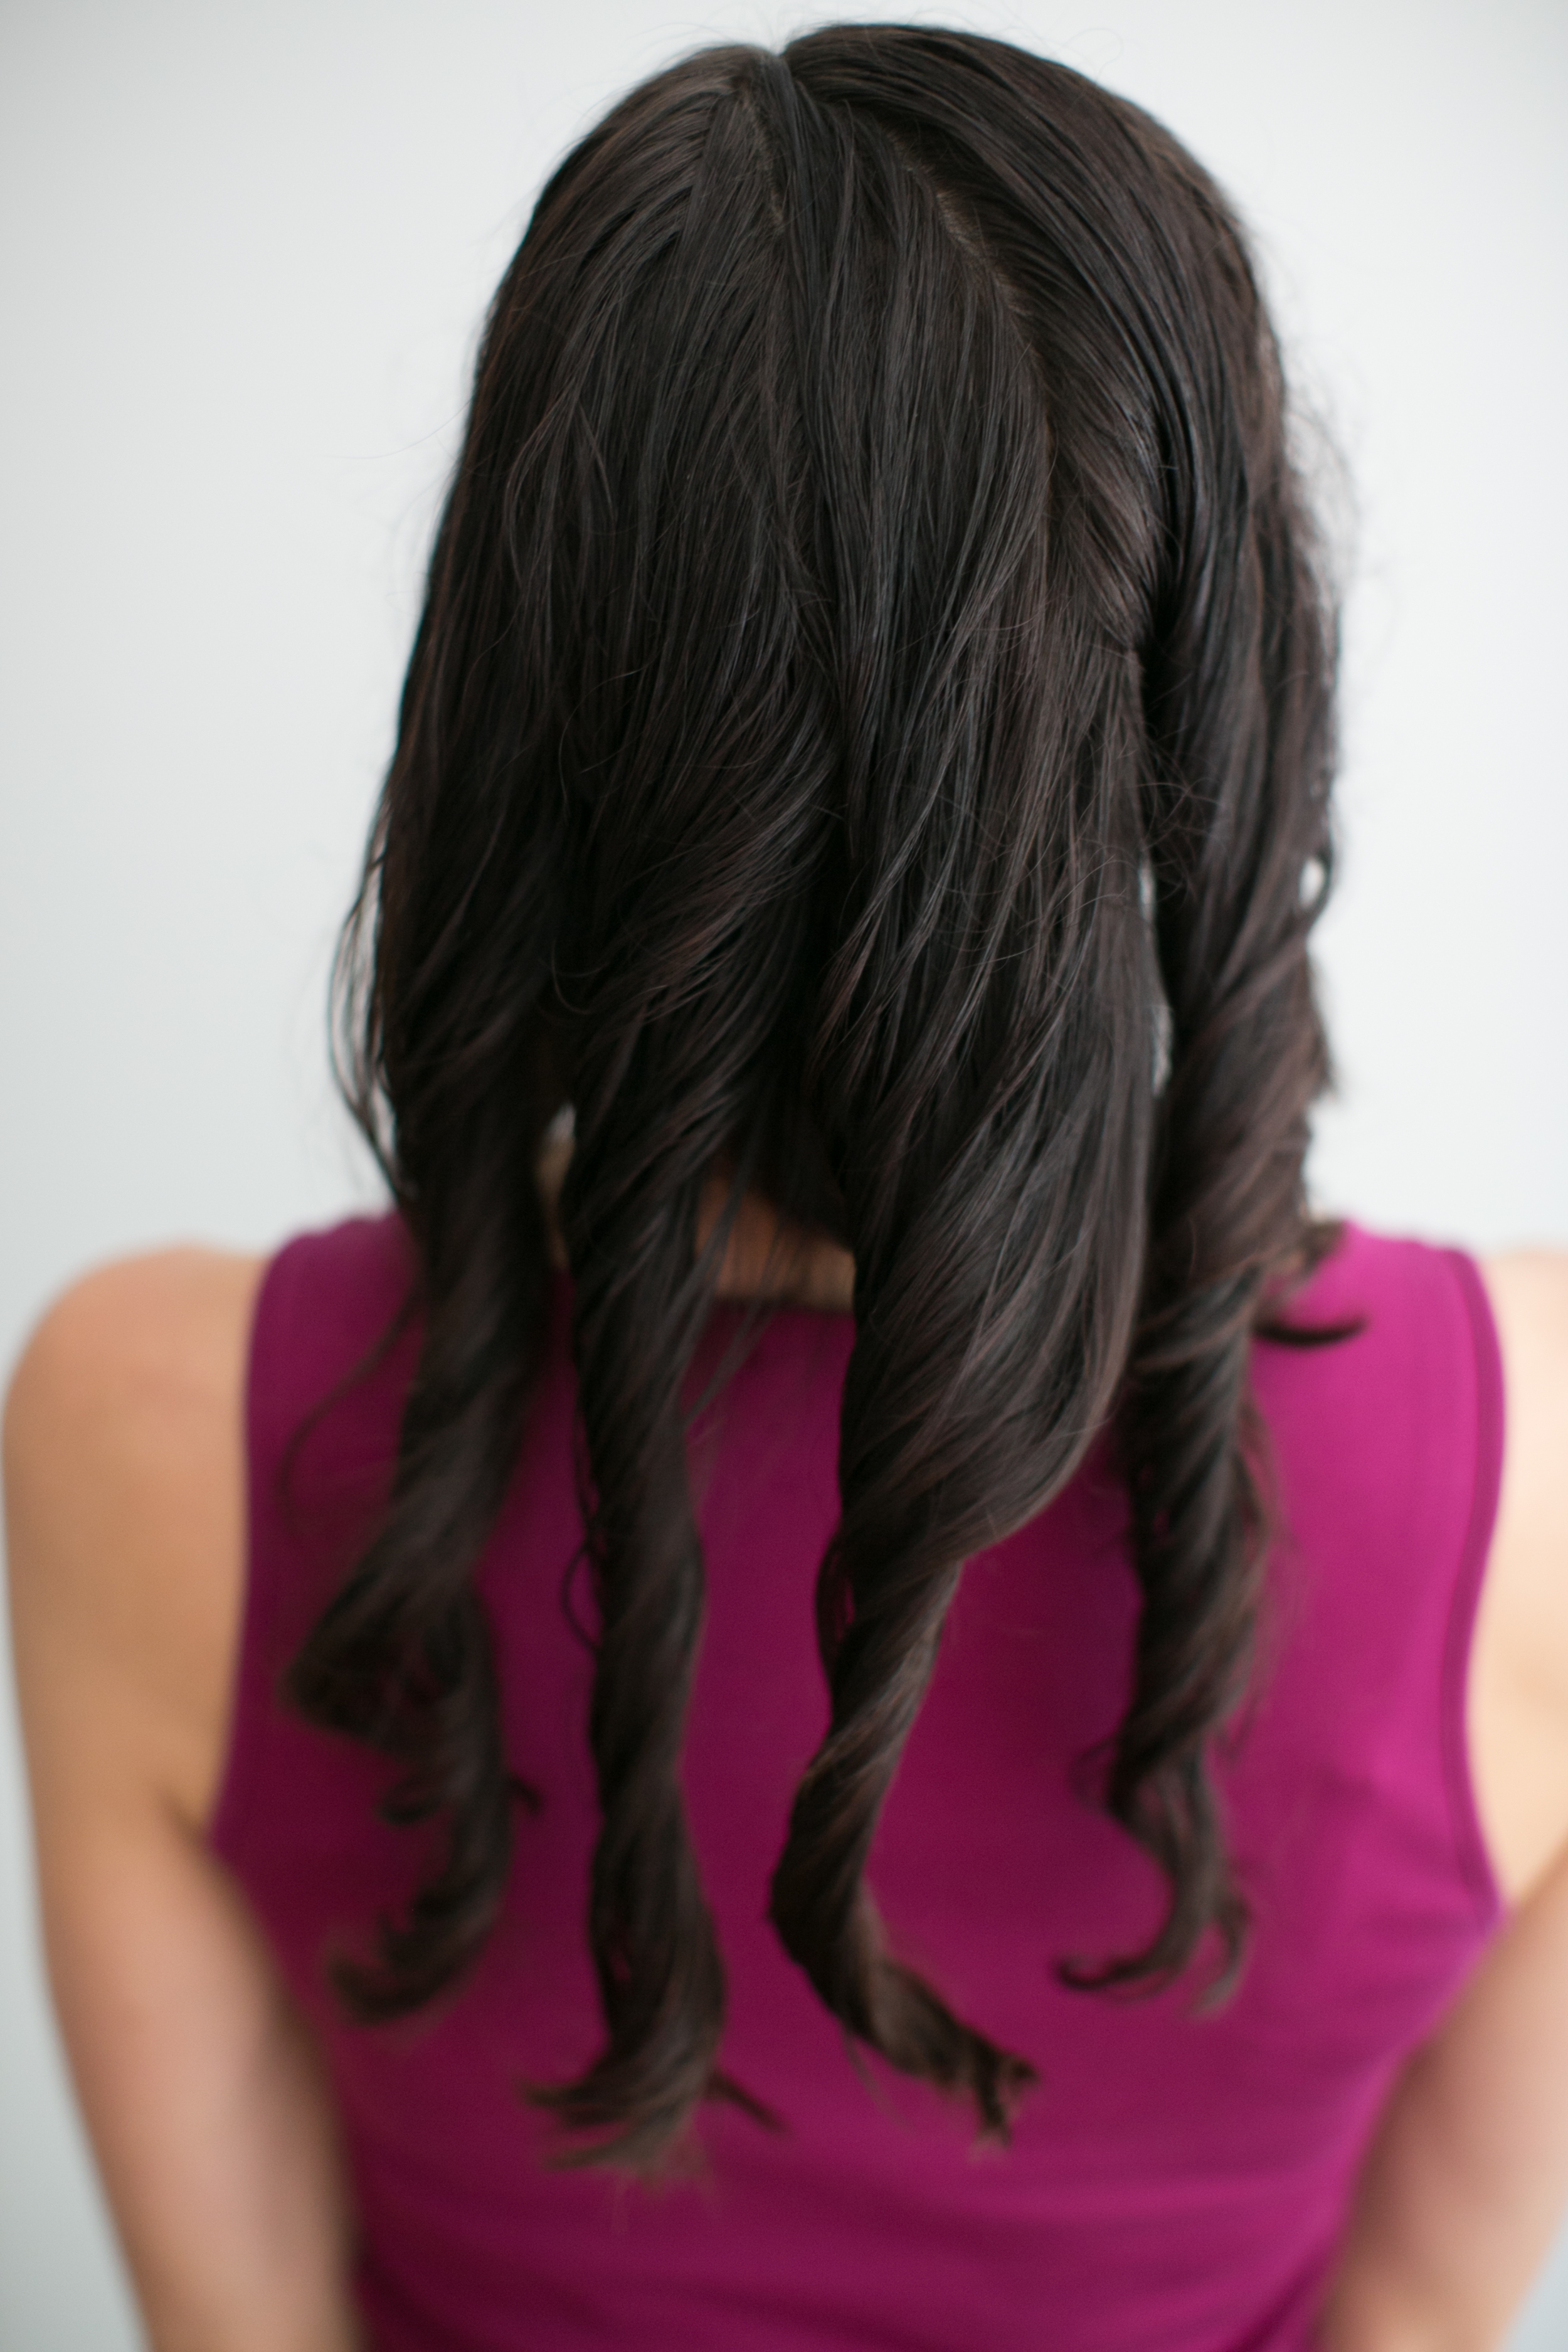
1. Shampoo, Condition from ponytail down, and towel dry hair. Comb through, and towel dry again. If too much water is still in the hair, it will actually create a barrier for the product. Add your curl enhancing product to your palms, and rake fingers and hands through your hair, beginning at the ends, and using what's "left over" on your roots. curls step 1 2. Comb large sections of hair up at a 90 degree angle, and begin twisting away from the face. Twisting with the 90 degree angle ensures you get plenty of volume. Work your way back section by section until all hair is twisted. curls pic 2 twistIt should look a little like this!

NI4A3355

3. I suggest doing steps 1 and 2 at night, and sleeping with your damp twisties either down or in a messy bun, from there you can wake up and shake it out! How cute is Christy!? If you prefer to shower in the morning, I suggest air drying.

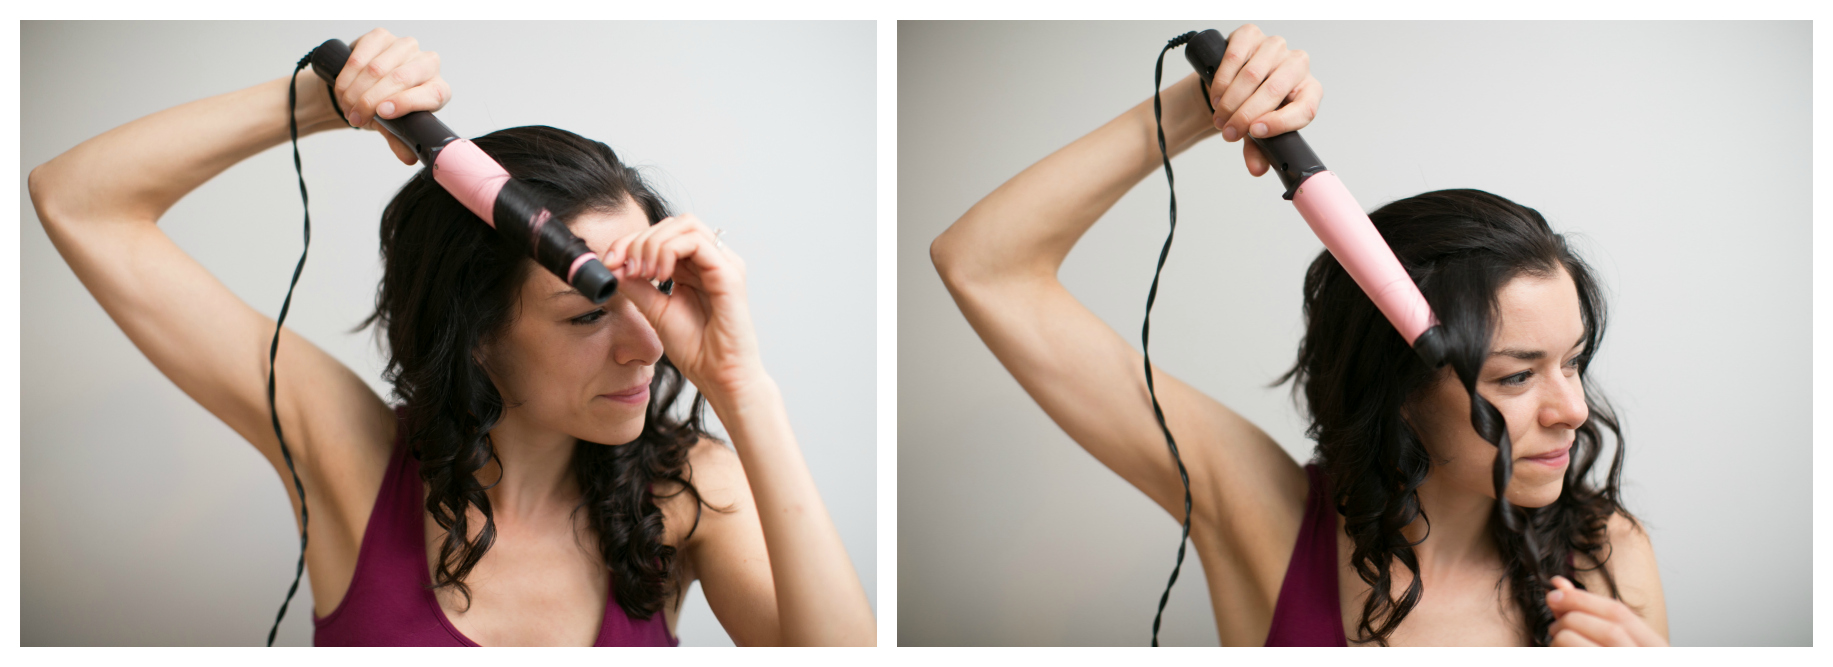
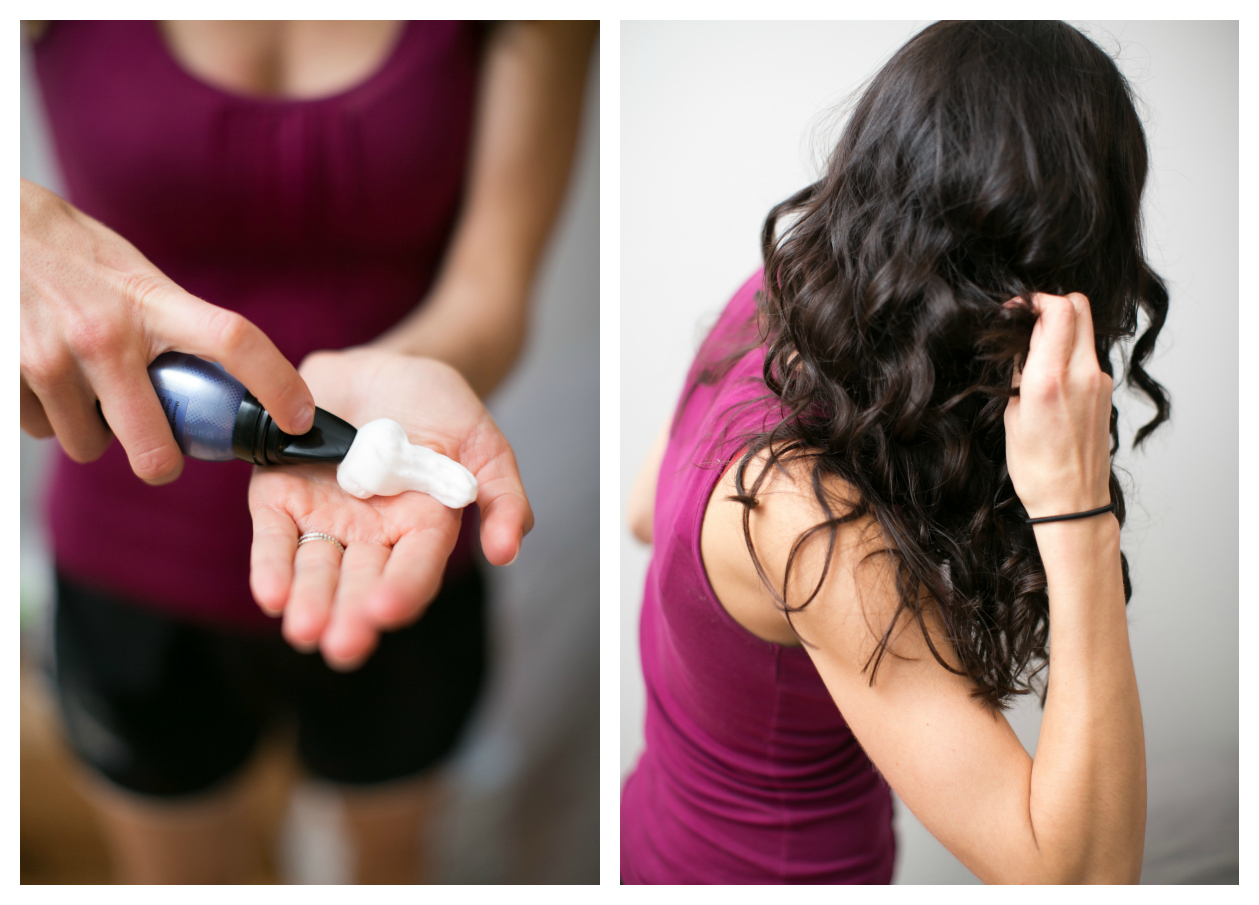
shake it out pic 4 4. Most girls with natural texture have the most wave in the ends, I recommend touching up just a few pieces on top for added polish and volume. You can do this using a regular curling iron, curling wand, or by curling with your flat iron. (BONUS TIP: You can use your curling iron like a wand by not opening the clamp!) wand pic six5. Add a finishing product and work through to add volume and extra dimension. Hair spray is great here, but I like breaking the rules and using mousse sometimes! mouse pic 6It's that easy! If you sleep with your wet twisties, all you have to do is wake up to shake and add a lil product! Plus skipping the step of blow drying gives your hair a break from high heat!

Have fun! XO AJ

Photos by Christy Tyler Photography 


As easy as 1, 2, 3! (really!)

You just got off work after a long day...You hired a babysitter.... You're squeezing in "you time" on your lunch break... You have a blind date tonight... Your rehearsal dinner is tonight...

... and I spin you around in the chair for to you see the UHmazing full voluminous sexy blowout you have. And of course you say, "Uhg why can't I get it to look like this!"

You can.

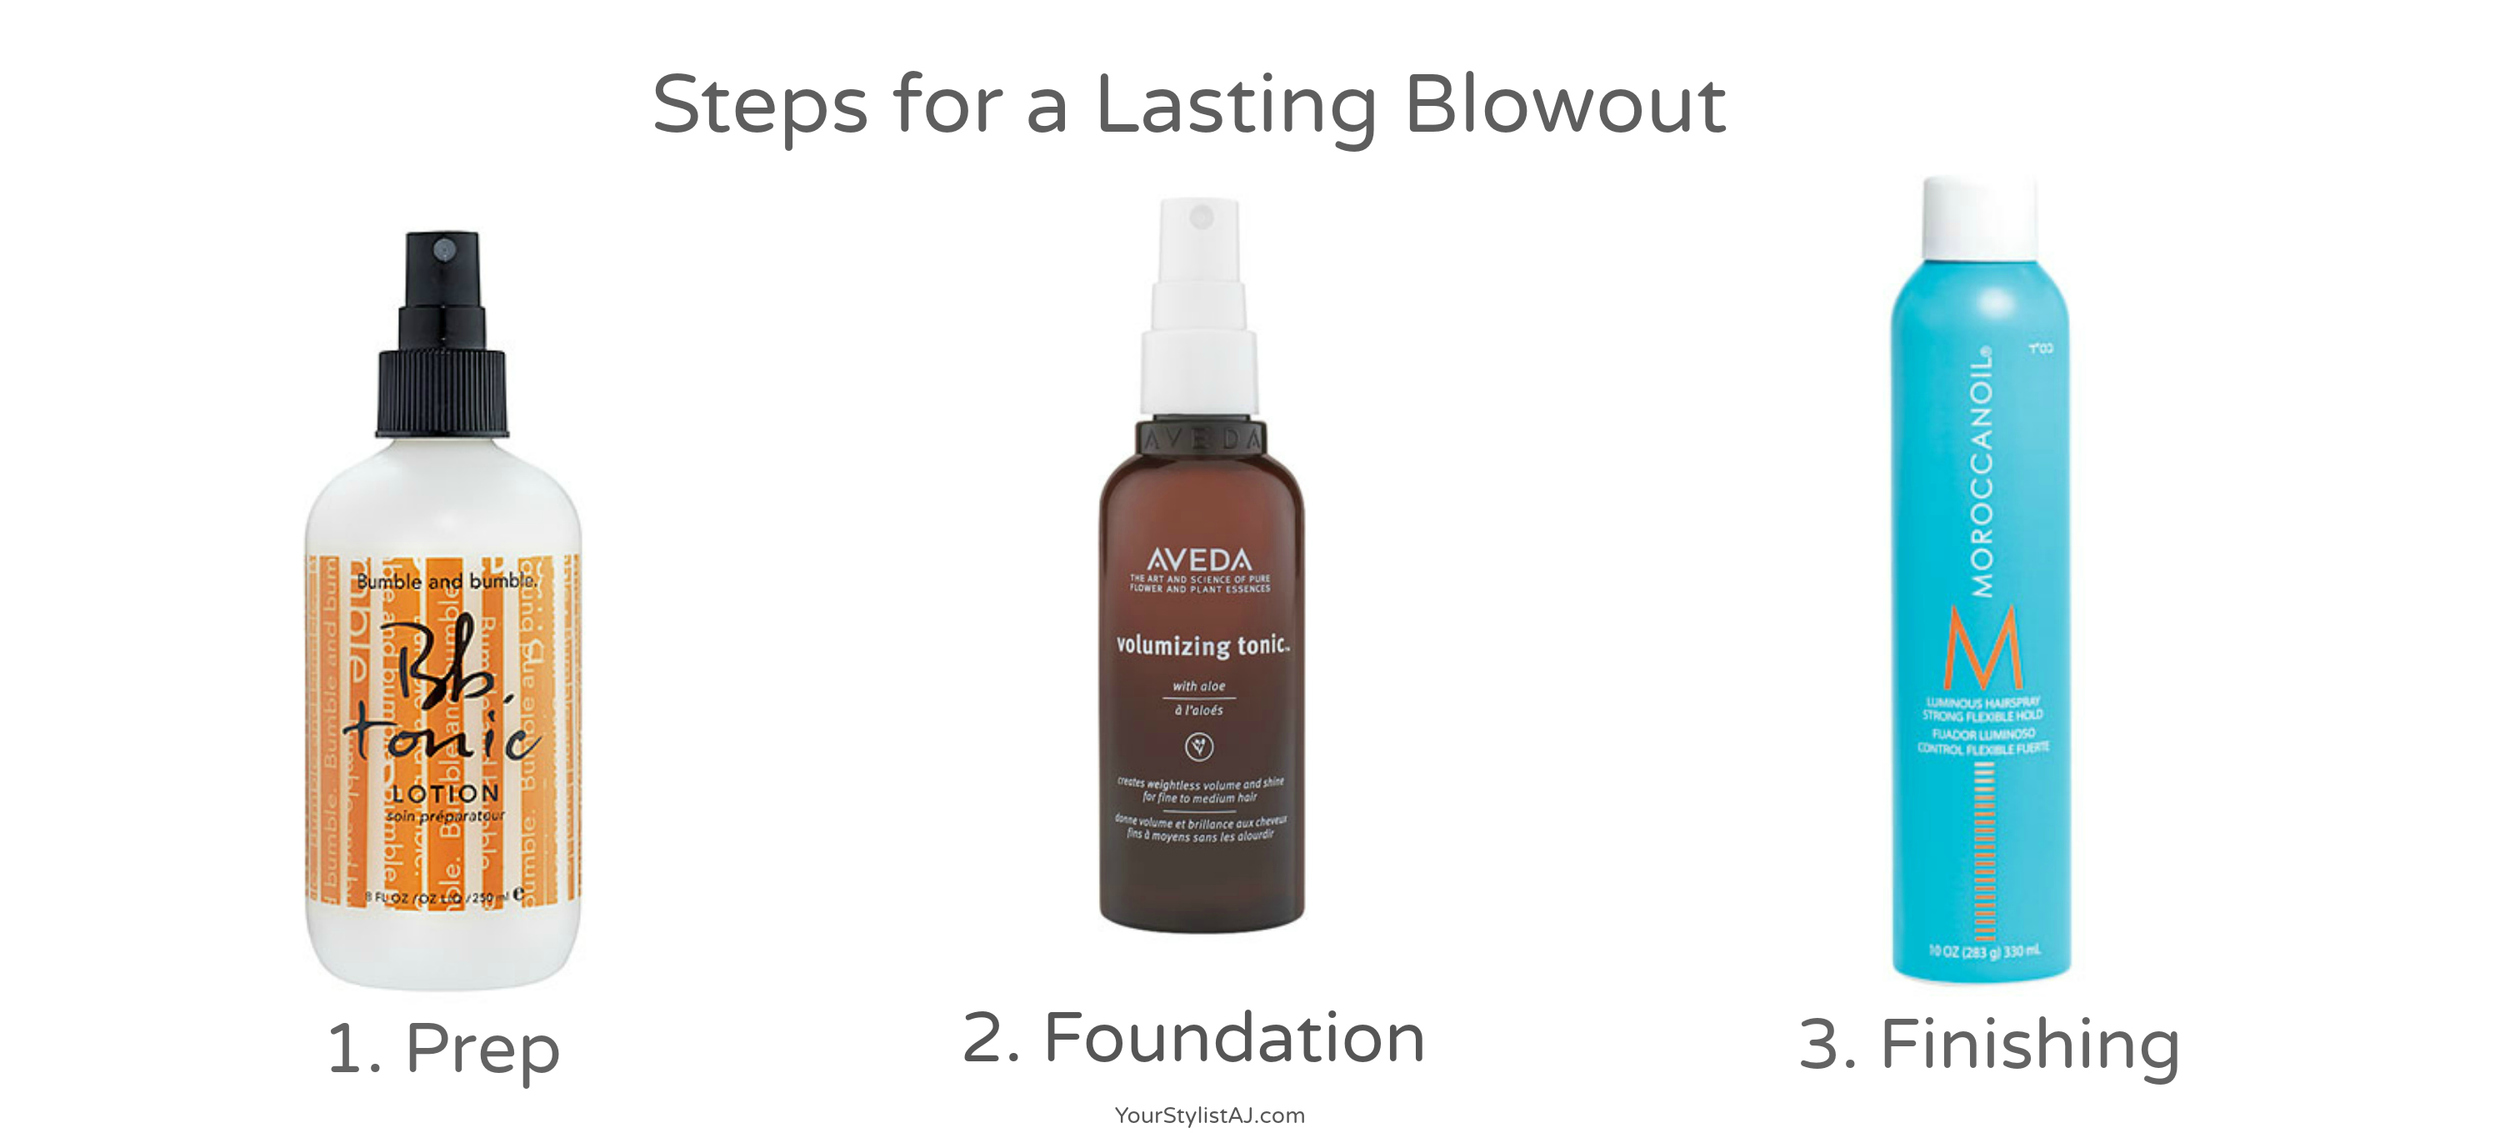
The trick to a beautiful blowdry isn't my fancy brush, dryer, or biceps, it's the appropriate prep, foundation and finishing products.

blowout1. PREP. Using a prep product like Bumble & Bumble's Tonic on clean wet hair is often a skipped step. Tonic equalizes the porosity from root to end ensuring the foundation product is evenly distributed, your hair is less tangly, and it's also great for your scalp. Other great prep products include: Moroccan Oil, Aveda Damage Control or Pureology Miracle Filler. (This all depends on hair type, please let me know if you're in search of the perfect prep product for you!)

2. FOUNDATION. Once you've rough dried your hair about 80% of the way, (yes, almost all the way!), evenly and thoroughly apply your foundation product from root to end, and not just on the top section missy! I love the Aveda Volumizing Tonic for medium hold, workable movement. Once applied, section and roundbrush. Other great foundation products include Bumble & Bumble Thickening Hairspray, Pureology or Kerastase Mousse, or Aveda Phomollient.

3. FINISHING. This is the fun part. Flip your head upside down, or look up toward the ceiling once your round brush is complete. Apply a finishing product, most commonly hairspray, and let dry before touching. Other options include Bumble & Bumble Grooming Creme, or Aveda Defining Whip, but I'm a sucker for a great long lasting, smell good hairspray!

Go play!

XO AJ


Hairdo Wrap Pony

“Clip in ponytail” doesn’t exactly have a classy ring to it… but for a reason unknown to me, I’ve always wanted to try it. My hair is already (pretty) long, but this works on almost any length. If you can get your hair into a ponytail, even if it’s two inches long, you can absolutely rock this look.

I purchased the HAIRDO Wrap Around Pony, (in Golden Wheat), and the color blended perfectly. The steps are actually extremely simple, but I’ve amped up the look by adding a top section to wrap around the pony to not only better blend color, but look even more sophisticated.

1. Section off a top portion of your hair, and clip it out of the way

2. Gather the remaining hair into a normal ponytail

3. Align and pin, (most come with built in pins), the extension piece to the top of the ponytail

4. Wrap the seam around your natural ponytail, securing the velcro for a snug fit

5. Now wrap the “extra” piece around the base of the new ponytail, and pin 

6. Unclip your first top section and lightly backcomb for volume if desired

7. Add the top section to the ponytail by wrapping it around the base, and pinning

If you have any questions please feel free to leave a comment below and I’ll make sure to help! Have fun : )

XO AJ

Fishtail Braid Tutorial

When I was little, I taught myself how to french braid, on my own head, via trial and error. Turns out my mom was also self taught when SHE was little! Clearly it’s in the blood.

So you can imagine my surprise when one of my lovlies came to me and asked for a braid tutorial. Though I think she’s a minority in this situation, (sorry Amber), I’ll be working with her one on one with her braiding! BUT, this motivated me to teach an even SIMPLER braid that’s hot right now, and not many people know how to do it.

The fishtail braid is great for those with little coordination. Instead of using three strands like the classic braid, you only use two!

K! Here we go!

1. Part your hair into two even sections

2. Take a small strand of hair from the right section and bring it over to the left side (Make sure to take small sections, or it will look more like a regular braid)

3. Repeat on the other side, taking a small piece of hair from the left and ADDING it to the section on the right

4-5. Repeat steps 2 & 3 until the fishtail is complete

6. (Suggested but not pictured:) Pull the braid apart to “fatten” it up for a more lived in bohemian look, OR wear this on the side!

Just keep swimming ;) AJ